Sunday, June 3, 2012

Pillows of Hope -Directions to make pillowcase

www.facebook.com/pillowsofhope                                              

Directions for a

PILLOW CASE of HOPE

For one pillowcase:
¨      3⁄8 yard (band)     Cut 1strip 10in x 41in
¨      7⁄8 yard (pillowcase body) Cut 1-26 ½ x 41 rectangle

Finished pillowcase: 30×20" (fits a standard-size bed pillow)

Quantities are for 44/45"-wide,
100% COTTON fabrics. Cotton or cotton flannel only NO FLEECE!
PLEASE PRE WASH !! 

Measurements include 1⁄2" seam allowances. Sew with right sides
together otherwise specified (French seams will be required for side and bottom)


1.   Place band strip right side up on work surface. Matching up long edges, put body rectangle right side down atop band strip. Pin edges together if desired.
2.   Beginning at lower long edge, roll the body rectangle toward the band strip. Stop rolling when you reach a point about halfway up the band strip. The upper raw edges should still be aligned Wrap the band strip around the rolled body rectangle to form a tube.
3.   Pin the three raw edges together, making sure the rolled rectangle portion does not get pinned.
4.   Sew pinned edges together with a 12 " seam allowance.
5.    As if you were pulling a sleeve from a sweater, pull the body fabric from the tube, turning the pillowcase band right side out to make a pillowcase body. Unroll the body rectangle. All seam allowances should be encased within the pillowcase band.
6.    Pulling slightly on the band, press the band flat with seam
allowances going toward the band.

To complete a fray-free pillowcase, finish it with French seams. You’ll have no raw edges exposed!

1. With wrong sides together (yes...wrong sides together) and a scant  14" seam allowance, sew together the side and bottom raw edges of the  pillowcase. For greatest accuracy, begin at the band and
sew  toward the opposite end. You may wish to pin the intersection where the band meets the body to make sure it aligns properly.
2 .Turn the pillowcase wrong side out and press the seam allowance flat. For best results, you may need to roll the seam between your fingers to nudge it to the edge prior to pressing.
3. With the wrong side still out and using a 14 " seam allowance, sew the side and bottom of the pillowcase again, enclosing the seam previously sewn . Now you have a pillowcase with no raw edges!www.facebook.com/pillowsofhope

Pillows of Hope

Cozy pillows help calm children who are faced with fearful situations and can bring them comfort

My goal is to see that each child receives a cozy, comfy, fun pillowcase to have of their own during their hospital stay at Cincinnati Children’s Hospital Medical Center

You can help bring hope to a child by:

     · Making pillowcases, donate your sewing skills (we need a lot!)
     · Donating fabric (see requirements below)
     · Be a Sponsor (takes approx. $7.00 to make 1 pillow case)

Requirements:
     - 7/8 yd fabric for body, 3/8 yd contrast for band (pre -washed)
     · 100% cotton fabric for summer pillowcases 
     · 100% cotton flannel for winter pillowcases
     · NO FLEECE 
     · No embellishments, ribbons, paints, or vinyl
     · French Seams (instructions will be provided)


My Inspiration to help:

Becca was diagnosed with ALL (leukemia) in October 2008, when she was just two years old. Her two-year plus treatment protocol was grueling, but Becca's strength and the support of so many wonderful people have brought her family through it. She finished chemotherapy treatments in December 2010, was in remission, and her prognosis was great. Sadly Becca was just diagnosed with a new type of leukemia (AML) on April 3 of 2012.

Mail completed pillowcases, fabric or donations to:

Pillows of Hope – Katie Dickert
7852 Camargo Rd.
Cincinnati, OH 45243
Or
Arrangements can be made to pick up if local

Follow our progress on:

www.facebook.com/pillowsofhope


Questions? email pamdickert@aol.com

Friday, June 1, 2012

Pillows of Hope -My youngest daughters project

Hello every!

Yes I know it's been too long since I've had a post, but sometimes life gets in the way.

I want to share with you a wonderful project my daughter Katie is doing. It's called Pillows of Hope and she will be sewing and donating pillowcases to Cincinnati Children's Hospital Medical Center!

In studies it's been proven that a soft, cozy object, whether it be a doll, blanket or pillow, will calm a child facing a stressful situation. Katie wants each child and teen to be able to have something of their own to hold on to. Being a teen herself she knows some of the older kids might be embarrassed bringing something from home would appreciate having a soft pillowcase!

Please read the blogs I've posted relating to this project. If you know how to sew get out that machine and 100% cotton fabric and help bring comfort and hope to the children! You'll find the directions on one of the blogs. 

Katie just started a facebook page--be sure to follow her-she is hoping people all over will send her pillowcases and she will post pictures as well as thank yous from children. www.facebook.com/pillowsofhope

This is a very exciting project and we hope you will want to join us too!

Wednesday, October 5, 2011

Nov 18th class

Class on Nov 18th


Nov 4th Class

here are the cards for the class on Nov 4th either at 9:3 or 6:30. 4 designs 2 of each $15.00


Oct 14 Card Class


We will be making 8 cards. 2 each of 4 different designs-$15.00. The class is Friday Oct 14th at 9:30  OR 6:30. Hope you can make it! Sorry about the 2 being side ways. Ive been trying to fix them and cant get it turned! I'd rather be stamping!!!!!! I hate tech stuff!


Stamp a Stack Christmas Class


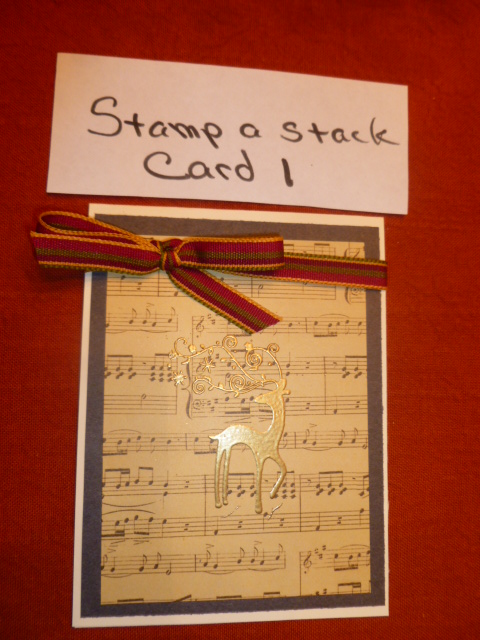
I'm having a Christmas stamp a stack class on Sunday Oct 23 starting at 1pm. we will be making 30 cards, 6 designs, 5 cards of each design -$30.00. Here are the designs!

Saturday, September 3, 2011

Hero Arts and Christmas

This is a bookmark card and a floating window card, both done at Stampaway. I told you I took a lot of classes!


Thursday, September 1, 2011

Copic coloring

I took another of Kathy Marshalls classes at Stamp your Art Out in Blue Ash. I always use my Copics to color these cards. It isnt a class on how to color, but its great practice with the images she uses. She always prepares everything for you and has the cutest papers! I also found out you can go over your copics with your Prisma pencils and Gamisol to make the shodow a bit darker, I've been working on my Halloween cards and having trouble with the Copic purples I have. I went over it with my Prisma purple and got the look I wanted.


Tuesday, August 30, 2011

A Really Cute Book!

Good morning everyone!

This post isn't about a card, but a really cute kids book my niece just got published. It's called "Counting Fun with Riley" Its a darling book if you have kids or are a grandma or teacher. And if you're a dog lover its a must. Riley is her weimer. and is featured  throughout the book. Its only about$10.00 and would make great gifts! Please check it out and help her out too!
This is the link where you can order it!
Thanks so much
pam
  Go to this site to order :        createspace.com/36   70921
Number Fun With Riley

List Price: $10.95

Add to Cart

Number Fun With Riley

Authored by Jen Ferone
Photographs by Janine Spang
This is a counting book for kids.


Publication Date:
Aug 25 2011
ISBN/EAN13:
1466224843 / 9781466224841
Page Count:
24
Binding Type:
US Trade Paper
Trim Size:
8.5" x 8.5"
Language:
English
Color:
Full Color
Related Categories:
Education / Teaching Methods & Materials / Mathematics

Hero Arts Cardinal

We made this in Jennifer McGuires class at Stampaway. She's simply the best  it !  We used Perfect Pearls again, this time brushing it on the image. This was a quick and easy card and love the stamp!

Saturday, August 27, 2011

Hero Arts Snowman

Love this snowman card from Hero Art. So much fun to do the background. You emboss the background, then use the Ranger Distress Stains to ink it up. Top it off with water mixed with the Perfect Pearls! its pretty, shimmery and perfect!

Friday, August 26, 2011

Stamp away ovals class

This was a class on Everything Ovals I took at stampaway this year.


Thursday, August 25, 2011

Stampaway USA

Last week was the big convention in Cincinnati! I took 6 classes and my mind was  in overdrive! Its such fun and you meet the most wonderful people at your tables. A couple of years ago I met Patti from Gatlinburg, we have remained in touch and took the classes together this year. We had wonderful dinners, wine, chocolates, shopping and came home with many ideas and techniques from the talented teachers. This year we met ladies from Virginia, Hilton Head, and I can't believe it but some from right here in Cincinnati! Debbie and her mom Judy were in 4 of our classes together and we became fast stamping friends. Is'nt  that what it's all about in life! This is what I love about stamping! It's brought together so many friendships for all of us, including my dear friend I couldn't be without, Laura! I met her as a stranger at a Stampin Up party over 10 years ago and we mean so much to one another now! Enjoy some of the cards from the classes...
pam


Tuesday, August 23, 2011

September Class

September 15th is the date for the cards inSeptember They are from the Stampin Up catalog. Mini cards with cute buttons for all occasions! I might add a quick Christmas card as a side project!

Monday, August 22, 2011

Outlines Cards


I'm trying my hand at the Outline cards. You stamp the image a few times then cut each layer out. I found black pop dots which are great to layer the images. You cant see that there is anything between the layers. I also used the new Deco Art Pearl Pens to embellish. These are great because you have excellant control. You can make tiny tiny dots, medium and large! On the peach card I used a sizzix embossing plate. I inked up the plate with Hero Arts Soft Sand, then placed the paper in it and ran it thru my Big Shot. It looks great! A wonderful way to get background paper. You just rinse off your embossing plate and your good to go!

Sunday, August 21, 2011

Memory Board

Wanted to share one of the memory boards from our Spring class. This is from Sandy G, my picture isn't very good, wish you all could see the board in person!

Saturday, August 20, 2011

Christmas Stamp a Stack

Wanted to share this weeks card class! We made 20 Christmas cards! Four desins five cards of each design. The girls are definately on track for Christmas!

Monday, August 8, 2011

My take on " My Favorite Things "stamps


These are from my class this Friday. I think everyone did great using Copics for the first time!

Saturday, July 9, 2011

Sweet Inocence


Aren't these adorabl! Copics and cutting and layering!